Windows Installation
After downloading the Windows install file, double click the setup
file to run the installer. You will be prompted to select a few
options such as where to install the files as well as whether to
include a desktop icon.
The Windows executable is currently only 32-bit due to limitations
of cx_freeze. We hope to have a 64-bit version available in the near
future.
After successful installation, you should be able to launch the
program from either your Program Files folder or the Start Menu.
Mac Installation
The Mac executable is found within the macOS Disk Image file (DMG) that
is available here. After
downloading the DMG file, double click the file to mount the disk image.
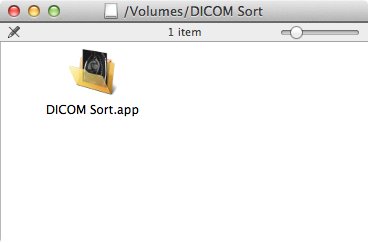
If mounting the disk image doesn't automatically open a Finder
window showing the contents, then you will need to navigate to
the /Volumes/DICOM Sort folder on your machine.
Simply drag and drop the DICOM Sort.app file from the DMG
onto your local machine, preferably in your Applications
folder. Double-clicking the file should launch the program.
Source Installation
It may be desirable to run the software using the source code if
there is a bug fix that may not yet be available in the executable
form, or possibly if you're running Linux. To successfully install
from source, you will need to install all dependencies listed in the
requirements.txt file. DICOM Sort is only tested to
work on Python 3.7+.
The stable release of the source code can be found
here.
The source code can either be downloaded directly from github or cloned using the following command:
$ git clone https://github.com/dicomsort/dicomsort
Once you have downloaded the source code and installed the appropriate modules,
you should be able to launch the software by running the
dicomsort bin stub.
The Source Directory
The first step in the sorting process is to specify where the DICOM
images that you would like to sort are located. Typically this would
be a CD exported from either an imaging system or PACS system.
Sorting is performed in a recursive fashion in that all images in
the source directory are sorted, even those in subfolders. As a
result be careful and specify a directory that contains only the
images that you would like to sort.

The source directory can be specified using the Browse
button or simply by entering the directory or dragging the directory
into the text field.
Once the directory has been selected, the program will scan the
folder in an attempt to find DICOM images. A warning will be provided
if no valid DICOM images were located. If all goes well, the
DICOM Properties list should be populated with fields from the
DICOM header
The DICOM Properties provides a list of valid fields that
were available for the DICOM images within your source directory.
These are the fields that can be used for sorting. It
is important to note that this list will change from modality to
modality and image to image.

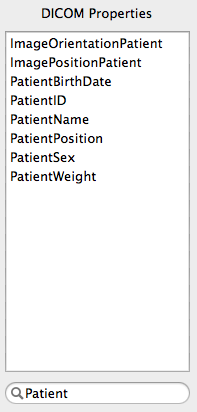
In order to quickly find a particular DICOM header field, use
the search box located below the DICOM Properties list.
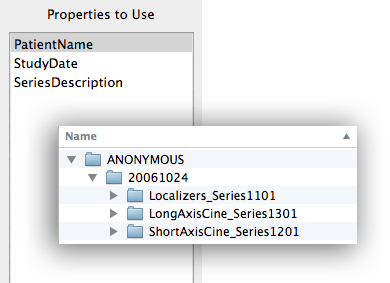
Properties To Use
The Properties To Use list shows the fields that are going
to be used for the sorting. By default, the SeriesDescription is
used.
The top of the list represents the top-level folder while lower
items are successive subfolders
Adding Sortable Fields
Fields can be selected for sorting by either double-clicking on the
property in the DICOM Properties list, or clicking on the >> button.
New fields are either added at the top of the list of underneath the
currently-selected item.
Removing Sortable Fields
Fields can be removed from analysis by either double-clicking on the
property in the Properties to Use list, or clicking on the << button.
Due to the fact that SeriesDescription often distinguishes similar
images, if you choose to remove the SeriesDescription field, you will
be prompted if you want to change the file naming convention to
ensure unique sorting.
Reordering Sortable Fields
You can re-arrange the ordering of the Properties to Use
list by either dragging the fields around or using the Up
and Down buttons.
By default we use a filename format which is a combination of the
image type and instance number. This results in Images such as:
- Image (0001)
- Mag (0001)
- Phase (0001)
This behavior can be changed in the preferences panel accessible
via the File menu.
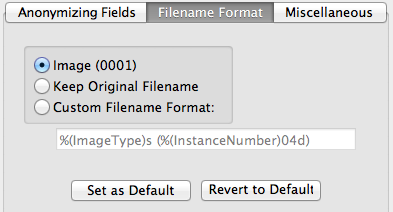
The options are as follows:
- Image (0001) - This is the default behavior as described above
- Keep Original Filename - Like it states, this will use the original
names rather than renaming the individual files. The files, however will still be
sorted into subfolders.
- Custom Filename Format - You can specify the filename specification you would like to use. You
are able to use token-based python string notation using any valid DICOM field (more info
here.
The string that currently populates this field is the string that is
used to generate the Image (0001) format.
When you are satisfied with your selection, click the Sort Images
button to perform the sorting. You will be presented with a dialog to
select the destination directory. This can be an existing directory
or a new directory. If you hit cancel, the sorting procedure will not
be performed.
The status of the sorting procedure is displayed in the status
bar. If there is an error during sorting, a log file will be created
in the program folder. Be sure to submit a bug report so we can get
it fixed!
Standard Anonymization
Anonymization can be performed during image sorting or on DICOM
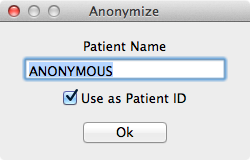
images in-place. The user can enable Anonymization by simply selecting
the Anonymize Data checkbox above the Sort Images button.
When you check this box, you will be presented with a popup which
allows you to specify the replacement Patient Name and optionally the PatientID.
Custom Anonymization
Because manufacturers all interpret the DICOM standard differently,
it may be necessary to specify additional fields to anonymize. You can
specify the fields to anonymize as well as the replacement values in the
Preference panel (Accessible from the File Dialog).
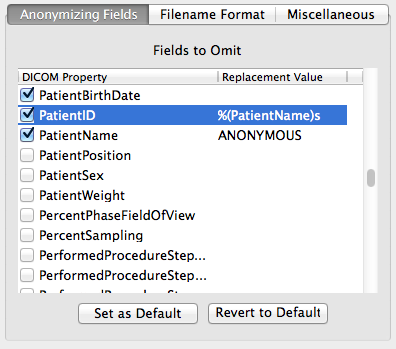
Specifying Field to Anonymize
To specify that you want to remove a field from the DICOM images,
be sure that the checkbox next to the field is selected. The field
will be replaced by the value specified to the right, or nothing if
it is left blank.
Specifying a Replacement Value
You can specify the value to use in place of the actual data in
the right-hand column.
One of the real powerful features is that you
can use python-based token-based string replacements. For example,
in the screenshot above, the PatientID field will be filled in with
the value of the PatientName field. The token can be any other valid
DICOM field present in the image. More information about the token-based
strings can be found here.
Be sure to save your own default configuration to make your life easier.